 In this column, Bobby Watkins of Ruland Mfg. Co. gives us an overview of some coupling-installation best practices.
Updated September 2019 ||Even if a coupling is properly selected, poor installation can cause failures. Following are four installation best practices to keep in mind when assembling your next motion design.
1. Ensure your selected coupling is used within its ratings.
2. We estimate that only about 25% of coupling installations are done perfectly. Fortunately, most applications aren’t so critical that they can’t accommodate that — or they’re installed well enough to avoid problems.
3. It may seem common knowledge but using the correct tool for installation is critical. Employ a torque wrench for tightening clamp screws on precision couplings to the proper torque. Using torque wrenches during installation will save a lot of time and trouble — and in some cases, can even prevent coupling failure arising from improperly torqued screws. Shim stock, feeler gauges, and shaft-alignment measurement tools such as dial indicators or laser systems are also of great help here.
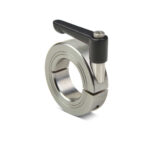
4. Some best practices are specific to certain coupling types. For example, rigid couplings should be installed starting with the two inside screws or four inside screws depending on the style of coupling. In the first pass, only seat to half of the recommended torque to ensure even clamping forces are maintained.
With rigid couplings, the proper screw-tightening sequence is to go inside to outside for proper installation with the shaft through the full bore of the coupling.
With beam couplings, tighten one hub first and then (before tightening the second screw on the other side) rotate the coupling by hand to allow it to reach its free length. Beam couplings in particular are sensitive to being installed at the free length or proper length. If you install beam couplings either compressed or extended, the life of the coupling will be drastically reduced.
We here at Ruland estimate that less than 25% of the couplings are installed by the book.
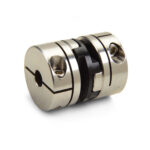
Lastly, there are Oldham couplings. When installing this type of coupling, slide the hubs onto the shaft with the tenons at 90° before inserting the center disc — and don’t tighten. Place the disc on one hub and center by hand. Use a shim the thickness of the coupling’s axial misalignment rating.
In short, Oldham couplings use a disc in the middle, and the disc actually moves up and down to accommodate parallel misalignment. A lot of installers believe that it’s correct to take an Oldham coupling and squeeze the hubs together and tighten it down. But what they’ve done is trapped that Oldham disc and prevented it from moving up and down to accommodate misalignment. If there’s no clearance in this coupling, its disc will have very limited life … and the assembly will exhibit all kinds of vibration problems as the disc is fighting to move up and down to accommodate misalignment. Again, it’s important to leave a gap by measuring with a shim when installing Oldham couplings.
For more information, visit www.ruland.com.


Leave a Reply